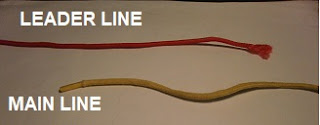
TYING THE TUNA BEND KNOT
Although I had had some
success with the Hornet Knot, it irked me that there did not seem to be a
‘super’ bend knot to tie together two pieces of slippery braid with one knot.
This is understandable given the nature of the material involved and the
availability of workarounds such as quick-change beads and swivels.
The Double Uni Knot is an
excellent standby and seems to perform better than other popular line-to-line
knots when a braid-to-braid knot is required. Yet, still I felt that there
might be a stronger alternative.
Taking the Aussie Quickie and Bristol Knots as my inspiration, I felt that to stand the best chance of
success, any knot I devised would need to use a doubled line in the weaker of
the two braided lines. I call it the Tuna Bend Knot mainly because of the
bi-directional doubled-line wrapping but concede that there are recognisable
elements of the ‘Quickie’ in there too.
Of course, you may have been
using it for years under a different name …
Well, whatever you may wish to call it, it seems to be a knot with a split personality. With thicker braided lines and copious amounts of lubrication, you can pull both sets of lines in opposite directions and watch the bi-directional wraps you have created bunch up as per the photos.
However, once you increase the
amount of outward wraps to x30 plus with a similar number of inward wraps, you
will find yourself massaging the knot into position.
Now, here’s the thing. I obtained
my exceptional results on my two super fine braids by deploying x30 outward
wraps and something like x25 inward wraps. I experimented with using a lesser
number of inward turns only to experience a corresponding drop in performance.
So, clearly, in this knot, unlike the Tuna Loop Knot, the amount of inward
turns are important. I should also add that I applied a Crocodile support knot
to all tag ends – both single and double.
As a braid-to-braid knot, I
believe The Tuna Bend is unrivalled. But what about its use with mono-filament
or fluorocarbon? Is this not the role in which it will be used the most?
Let’s see …

(click on photos to expand
M denotes Mono-filament Section)
01 M 
Take the heavier of your two lines and form a loop in it. Here, the ORANGE is being used to represent the heavier line. Then, take a good length of the weaker line and form a long loop in that too - the length of the loop will have to be long enough to accommodate all your turns. This will be represented by the YELLOW lace.
Lay about three quarters of the length of your lighter line across the heavier line as shown
|
02 
Grip the two sets of lines between thumb and forefinger where they intersect
|
03 M 
Wrap down the length of the heavier line with the lighter line keeping the spaces between turns roughly even.
With the finest braids, you want to try to load up at least x30 turns and if you can get to x35 or x36, so much the better. Remember, it gets more fiddly the more turns over x30 you use. However, I feel that the extra effort to make these turns will edge you closer to the 100% mark.
As they say in racing, 'horses for courses'
|
04 
And now, wrap back up in the opposite direction 'till the top as shown
|
05 M 
Now slip the loop of your wrapping line up through the underside of the loop of the heavier line.
You may be tempted to try an additional tuck at this point. Don't, as it prevents the knot cinching properly
|
06 
In this 'finger selfie', I am getting ready to cinch. Like the Hornet Bend before, grasp the two lighter (YELLOW) lines with one hand and, after suitable lubrication, pull on just the main line of the heavier (ORANGE) line with your other.
The loop of heavier line (here shown on the right of the picture as viewed) should snug down
|
07 
Here is the cinched knot. With heavy lines like these, you will find that a combination of using turns not too-tightly bound and gentle pulling in opposite directions on the main and tag end lines of each side will cause the lighter (YELLOW) line to bunch up neatly as shown.
However, as soon as you use lots of wraps, you will find yourself pulling on all the lines and massaging the lighter line into position before you are ready to fully cinch
|
08 
Many might settle for the knot as is in the previous frame. However, particularly with lighter lines, attention to detail can enhance the performance of the knot.
Here, I am locking down the loop end of the thinner wrapping line by forming it into a series of Crocodile Cow Hitches - how many you can make depends on how much loop length you have with which to make them
|
09 
Because we are working with a double line, the 'over' hitch comprises two strands
|
10 
And here comes the 'under' hitch. This double line will be expended more quickly than a single tag end - but it is worth it with fine braid
|
11 
Don't forget to attend to the single line tag end as well. Put on at least a x20 Crocodile (but x30 is better). Here you see the 'over' hitch being formed
|
12 
And here comes the 'under' hitch to complete the first Cow Hitch
|
13 
The right-hand side is complete. The left is to come
|
14 M 
And here is the completed knot. It looks like some two-headed creature - not particularly attractive.
Obviously, once the tag ends have been snipped off, it looks a bit more streamlined, and, of course, does what most cannot ... forms a strong braid-to-braid knot
|

'Some are born great, some achieve greatness, and some have greatness thrust upon them' - William Shakespeare
Of all the knots I have set before you, this, The Tuna Bend Knot, seems to be the Alexander the Great of knots as it brushes aside all challenges presented to it. Unlike my other knots, it came into being in a flash of insight. Nor did it require too much fettling. Truth be told, I had been looking for a line-to-line knot with the all-round ability of the Double Uni Knot, but much much stronger. At the first attempt, it easily matched my attempt to join a fine braid to an even finer braid using the Double Uni. At the second attempt, with a few tweaks to the recipe, it sped off into the distance, never looking back.
At a stroke, I went from having no expectations about this knot to wondering how well it would perform with mono-filament. It was with great relief when, at the first time of asking, the reading on my scales swept all the way round to 100% without a breakage.
The Tuna Bend Knot has elements in common with knots such as the Aussie Quickie, Bristol, Yucatan etc. yet has elements that are all its own.
Using the same two lines as I used with the Hornet Knot, I noticed the wrappings didn't move at all when pulling on the main line and tag end of the braided line nor was I able to close the loop in the heavier line, suggesting that far more grip was being applied even to a surface as 'glassy smooth' as this. Once I used thumb and forefinger to slide the body of the knot into place, it moved readily enough. This is the chief reason why, I believe, it performs so much better than the Hornet Knot at joining two pieces of braid.
As is customary, I will now present the braid slides, but this time, they will be divided into two sets:
1. Braid to braid
2. Braid to mono-filament
Don't forget, this knot rewards handsomely patience, care, and attention. It is, therefore, not the quickest of knots to tie ...
RECIPE
- Braid to braid - x35 wraps each direction + >= x1 tag end loop Cow Hitches + x30 plus Crocodile each side with the single line tag end
- Braid to mono-filament - x35 wraps each direction + >= x1 tag end loop Cow Hitches + x30 plus Crocodile braid side and a single Cow Hitch on mono-filament side
BRAID TO BRAID
(click on photos to expand)
01 
Here are the two braided lines for joining - fine and finer
|
02 
With braid to braid, the frames will not be easy to see. In this one, you can just make out a loop of the finer line being laid across a loop of the heavier line
|
03 
The long tag end loop of the finer line has now been wrapped around the loop of the heavier line and can be seen exiting at the bottom of the frame
|
04 
Here, you can see that the tag end loop has been wound back up the body of the knot towards the loop in the heavier line - note how long it is. Something of a miscalculation on my part, I think
|
05 
A nice clear shot of the tag end loop being inserted through the back of the loop of heavier line
|
06 
Holding onto the main line and single tag end visible bottom right, I have pulled on the main line of the heavier line (after suitable lubrication, of course) to tighten down the heavy-line loop in the previous frame. And being braid also, it cinches with ease. That leaves the prominent tag end loop sitting proud.
Even a 'Wise Owl' can be a 'Booby' at times ...!
|
07 
Here, I am taking full advantage of the extra length of the tag end loop to make make a 10-hitch Crocodile around both main line and tag line.
It's good to lay down some Cow Hitches with this tag end loop, but it's far more important to lay down a nice long Crocodile using the single-line tag end
|
08 
Just visible are the additional Cow Hitches laid down using the tag end loop
|
09 
Look closely, and you can see that a 20-something Crocodile has been added using the single-line tag end
|
10 
In this shot, the Crocodile has just been added to the heavier line on the left of frame
|
11 
All trimmed up and ready to go ... The finer of the lines is on the left as viewed as denoted by the pair of stumps where the tag end loop used to be
The recipe used was: x30 wraps down; x25 wraps up; x10-hitch tag end loop; x20-hitch Crocodile each single tag end. Note the improved recipe above
|
12 
Testing Times - the lighter braid has been wrapped multiple times around the hook of my scales. Off-camera, is the spool of heavier braid
|
13 
End Game! - 8.4 lbs b/s on the finer 9 lbs b/s line.
A creditable 93.3 %. With a few adjustments, it could be even better!
|
BRAID TO MONO
I expect this is the combination you have been waiting for as, along with fluorocarbon, this is a popular set-up. I have a small confession to make - the only time I am likely to want to know how to make a line-to-line connection is if I wanted to top up existing braid on my spool with a fresh lot.
That said, I believe the line-to-line knot sets the habitual braid fisher one of the most sternest of challenges there is - perhaps on a par with something like fly-tying. Usually, you are handling two different types of material with different cinch rates whereas with a connection knot or a loop knot, you are dealing with just the one.
For the record, I always find myself surprised when I have occasion to work with 20 lb mono-filament line. Sure, I use lesser poundage's all the time without issue, but once I reach this 'magic number', I find it much harder to cinch, and, for whatever reason, the brand I have selected for my demonstrations, seems exceptionally unyielding!
So, don't go thinking that this 'Old Bird' has some God-given talent unavailable to the rest of you ... I am just as capable of struggling like everyone else. The difference, if there is a difference, is that through dint of hard work, I know that what I am struggling to attain is attainable.
And now, you too can share in that same knowledge.
(click on photos to expand)
01 
Holding the mono-filament line with the fingers of my left hand, I lay what I think is the appropriate length of doubled braid across for about three quarters of its length.
I've said it before, but there is a good case for noting down how many millimetres of doubled line braid you need to use as you need to have enough for x2 Crocodiles on the braid side.
In these following examples, I left myself just enough to make the x30 Crocodile with the single-line tag, but because I did not have a generous amount of tag end to work with, it took much longer to make than it should have - economy at the expense of time, if you will!
|
02 
x30 wraps down ...
This is typical of how you expect it to appear at this stage
|
03 
x30 wraps up ...
The wrapping tag end loop has been passed around the back of the heavy-line loop and brought through it to the front
|
04

Off-camera, I held the braided main line and single-line tag end in my right hand pulling on just the main line of the mono-filament with my left hand in a bid to cinch the heavy-line loop.
Unlike in the braid-to-braid example above, it did not move. There was too much grip. Accordingly, I massaged the body of the knot along towards the heavy-line loop until it disappeared and everything was 'splendidly taut'. Further, I slipped the protruding tag end loop onto the hook of my scales and tensioned that also.
In this frame, I am sealing off the heavy line with a Cow Hitch. This is the 'over' hitch being laid down. x1 Cow Hitch will suffice
|
05 
And here comes the 'under' hitch to complete the Cow Hitch and lock the heavy line in place
|
06 
Here, you see the completed knot.
On the left-hand side is the mono-filament Cow Hitch; in the centre is the upright tag end loop similarly with a Cow Hitch (I wanted to do more but did not have enough braid - but it didn't seem to matter); and on the right-hand side is the Crocodile using the single-line tag end
|
07 
Chocks Away! The tag ends have been trimmed and a Surgeons Loop has been added to the heavy line.
We are cleared to make our maiden test flight with this combination of lines, It should be good, but you never know for sure until you put it to the test ...
|
08 
Safely Landed! The join has smoothly made it to the maximum 100% without breaking but looking slightly the worse for wear, perhaps.
This merely serves to show the forces at work - those same forces we are seeking to contain. Note how the previous frame shows the Surgeons Loop barely cinched when compared to this one. The main body of the knot has stretched slightly but still remains intact.
We have soared like an Eagle and taken it to the limit one more time ...
Back here on terra firma, I have a quiet chuckle to myself, as if to question why I was ever in any doubt. Right from the very first, this knot has delivered. No mess, no fuss, just consistent smooth performance.
Of all the knots I have presented to you, possibly I have saved the best until last!
|
PB