
TYING THE MAHIN (KRAKEN) LEADER KNOT
It's fair to say that there have never been so many quality line-to-line knots at our disposal as there are to be found today. On their day, they can all reach prodigious feats of strength and endurance, and if the discerning angler seeks after slimness of profile, he need look no further than the likes of the FG Knot, SC Knot, or PR Bobbin Knot.
So, why do I think you should be interested in this knot when you already have such fine knots to choose from? Will this knot be any stronger than my favoured pattern? Is not 100% still 100% howsoever it is achieved?
Howsoever it is achieved
The Mahin Knot goes about its business in a more conventional mode of tying which is more immediately-familiar to the average knot-tyer, nor is one line required to put the 'bite' on the other such that the whole knot can fail through lack of grip. This knot is very easy to understand for new and seasoned hand alike, and cinches smoothly to an ultra-low profile matching the aforementioned.
Thus, when you see that I am portraying a knot that presents as slim a profile of knot as the others, in as secure and easy-to-understand package that will be every bit as strong as its peers, what is not to like?
NOMENCLATURE AND BACKGROUND
The name Mahin seems to be Persian in origin and means Of The Moon. It conjures up a touch of The Arabian Nights, perhaps.
As bewitching as this name may be, and as prosaic as its other moniker of Carrot Knot is, I think such a knot as this is deserving of a more imposing name - something that can match its towering performance ...
Inspiration came when I looked at the following picture:

It looks to me like a Giant Squid, aka The Kraken ...
My researches indicate that this knot was favoured by sea anglers and then adopted by carp anglers for providing the low-profile knot for attaching their shock leaders. So, a name such as The Kraken Knot would be entirely in keeping with its nautical associations whilst imparting just the right amount of awe to the reader.
On this occasion, I have decided to share with you how I tie this knot step by step. I will be showing the standard 'Overhand (Knot) on the leader' style where a thinner or comparable diameter main line is being wrapped around the leader line. This gives the sleek bullet-like appearance you see above. The alternative approach is where you have the 'Overhand on the main line' and you are using a much thinner leader line to tie up around the much thicker main line. This too works well, as we will see.
OVERHAND ON THE LEADER
|
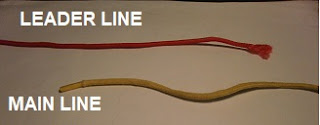
01 For the purposes of this exercise, I have chosen the red cord as my leader line and the yellow as my main line - they are approximately of equal diameter.
|
 |
 |
 |
 |
 |
 |
 |
 |
Before taking you to the first of two videos, allow me to share with you some pics of my own humble efforts:
|
|
|


Now let's watch it being tied in real time:
I've watched the following video many times and am still not sure whether the presenter is tying this knot back to front or not. But whether he is, or he is not, it gave me the idea of placing the 'Overhand on the main line' when you wish to tie thinner mono or fluoro to a thicker main line:
|
|


The above two pics are my take on the 'Overhand on the main line'. I have a 20 lbs clear mono main line to which I wish to attach my 10 lbs fluoro leader. As the fluoro is thinner and more pliable than the thicker mono, I have started by making the 'Overhand' on the main line. I had one or two attempts at this and found that by lubricating both main and leader before starting, the fluoro neatened up a lot more smoothly.
I actually tested this knot using the reversed half hitches in place. It might be overkill, but it seemed to affirm my notion that I would get just as much performance 'this way around' and make life easier for myself by using the thinner of the two lines to do the binding. The 'head' may have been bent out of shape as a result, but a confident 10 lbs was witnessed just the same.
While I was researching this knot, I came across this useful posting which includes the Mahin Knot and a few others - http://www.carp-uk.net/knots/shockknots.htm.
BRAID TO BRAID
Braid, and fine braid in particular, takes no prisoners. If you require a high-performance union when joining braid to braid, this is NOT the knot to use.
In fact, so difficult is the task, few knots measure up. It's akin to trying to tie two live eels together!
As a 'make-do' knot, the Double Uni Knot is not a bad option. Pile on the turns on each side of the knot and it will hold better than most. As I recall when tying a 9 lbs braided line of 0.06 mm to my 11 lbs braided line of 0.08 mm (1.5 lbs mono diameter to 2.0 lbs mono diameter - so pretty thin), the weaker line tested to just over 7 lbs b/s.
My home-brewed Tuna Bend Knot was able to give a much stronger performance without any seeming increase in profile. But then, it is an uncompromising knot which takes no half measures - everything is doubled for maximum grip and traction which is precisely what is required to tackle such a slippery material. Using single-line knots automatically will put you at a disadvantage.
Good knot and tutorial, but I must say that in my nearly 60 years I've never heard an overhand called a Granny. A simple overhand knot isn't a "Granny" knot. A Granny knot is when a person attempts to tie a square knot (reef knot) and doesn't reverse the order on the second overhand.
ReplyDeleteA proper square knot is "right over left, left over right". A Granny knot is "right over left, right over left" (or reversed: L/R, L/R).